전체코드
import 'package:flutter/material.dart';

void main() {
  runApp(MyApp());
}

class MyApp extends StatelessWidget {
  // This widget is the root of your application.
  @override
  Widget build(BuildContext context) {
    return MaterialApp(
      title: 'Flutter Demo',
      theme: ThemeData(
        primarySwatch: Colors.blue,
        visualDensity: VisualDensity.adaptivePlatformDensity,
      ),
      home: MyHomePage(title: 'Flutter Demo Home Page'),
    );
  }
}

class MyHomePage extends StatefulWidget {
  MyHomePage({Key key, this.title}) : super(key: key);

  final String title;

  @override
  WidgetSample createState() => WidgetSample();
}

class WidgetSample extends State<MyHomePage>{
  @override
  Widget build(BuildContext context){
    double appBarHeight = 50.0;
    return MaterialApp(
      home: Scaffold(
        appBar: PreferredSize(
          preferredSize: Size.fromHeight(appBarHeight),
          child:AppBar(
            title: Text('Widget Demo'),
            backgroundColor: Colors.cyan,
          ),
        ),
        body: Red(),//Blue(), Green() 으로 바꿀 수 있다.
      ),
    );
  }
}

// Card 위젯 구현
class Red extends StatelessWidget {
  @override
  Widget build(BuildContext context){
    return Container(
      width: MediaQuery.of(context).size.width,
      height: MediaQuery.of(context).size.height,
      child: Card(color: Colors.red)
    );
  }
}

// Text 위젯 구현
class Green extends StatelessWidget {
  @override
  Widget build(BuildContext context){
    return new LayoutBuilder(builder: (context, constraint) {
      double min = (constraint.biggest.width < constraint.biggest.height)
          ? constraint.biggest.width : constraint.biggest.height;
      return Container(
        width: constraint.biggest.width,
        height: constraint.biggest.height,
        color: Colors.green,
        child: Center(
          child: Text('GREEN',
            style: TextStyle(fontSize: min / 4, color: Colors.white, decoration: TextDecoration.none, fontWeight: FontWeight.normal)
          )
        )
      );
    });
  }
}

// Icon 위젯 구현
class Blue extends StatelessWidget {
  @override
  Widget build(BuildContext context){
    return new LayoutBuilder(builder: (context, constraint) {
      double min = (constraint.biggest.width < constraint.biggest.height)
          ? constraint.biggest.width : constraint.biggest.height;
      return Container(
        width: constraint.biggest.width,
        height: constraint.biggest.height,
        color: Colors.blue,
        child: Icon(Icons.access_alarms, size: min / 2, color: Colors.white),
      );
    });
  }
}
PrefferedSize
appBar에 바로 AppBar Widget을 할당하지 않고 PrefferedSize Widget을 할당하였다. PrefferedSize 는 appBar의 크기를 고정시킬 수 있는 역할을 한다. 지금은 size를 50으로 고정하였다.
Red, Green, Blue
class Red extends StatelessWidget {
  @override
  Widget build(BuildContext context){
    return Container(
      width: MediaQuery.of(context).size.width,
      height: MediaQuery.of(context).size.height,
      child: Card(color: Colors.red)
    );
  }
}

class Green extends StatelessWidget {
  @override
  Widget build(BuildContext context){
    return new LayoutBuilder(builder: (context, constraint) {
      double min = (constraint.biggest.width < constraint.biggest.height)
          ? constraint.biggest.width : constraint.biggest.height;
      return Container(
        width: constraint.biggest.width,
        height: constraint.biggest.height,
        color: Colors.green,
        child: Center(
          child: Text('GREEN',
            style: TextStyle(fontSize: min / 4, color: Colors.white, decoration: TextDecoration.none, fontWeight: FontWeight.normal)
          )
        )
      );
    });
  }
}

class Blue extends StatelessWidget {
  @override
  Widget build(BuildContext context){
    return new LayoutBuilder(builder: (context, constraint) {
      double min = (constraint.biggest.width < constraint.biggest.height)
          ? constraint.biggest.width : constraint.biggest.height;
      return Container(
        width: constraint.biggest.width,
        height: constraint.biggest.height,
        color: Colors.blue,
        child: Icon(Icons.access_alarms, size: min / 2, color: Colors.white),
      );
    });
  }
}


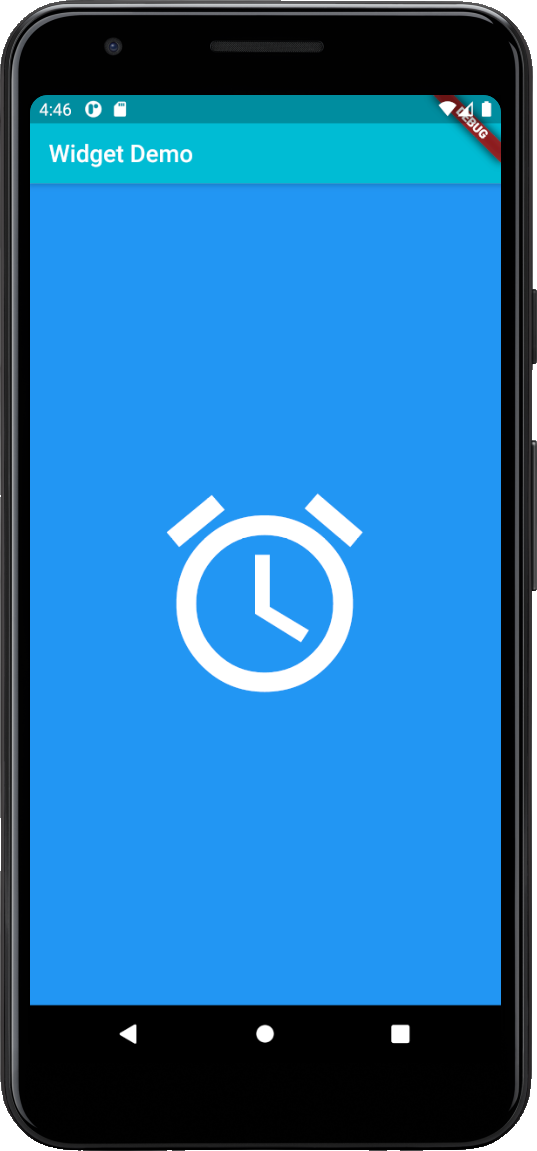
위 세개의 Widget은 기본적으로 동일하다. 요약하자면 Red는 Container Widget에 Card Widget으로 단순히 빨간화면을 출력하고, Green과 Blue는 Container Widget으로 각각 초록화면에 Text, 파란화면에 아이콘을 출력한다. 이전 글에서 Scaffold에 대해 간략하게 설명했었다. (https://cdl-dev.tistory.com/9) Scaffold가 전체 화면을 구성하는데 있어서 많이 쓰이는 기본 Widget이라면 Container는 Scaffold의 body요소에 거의 기본적으로 쓰이는 Widget이라 할 수 있다. 아마도 굉장히 많이 쓸 것이다.
- Container
Widget을 담는 그릇이라고 생각하면 된다. width, height요소에 반드시 double형 변수를 할당해야 화면에 출력되며 Red의 경우 child 에 Card를 할당하여 모서리가 살짝 둥근 Widget을 출력하였다.
- MediaQuery.of(context).size, LayoutBuilder
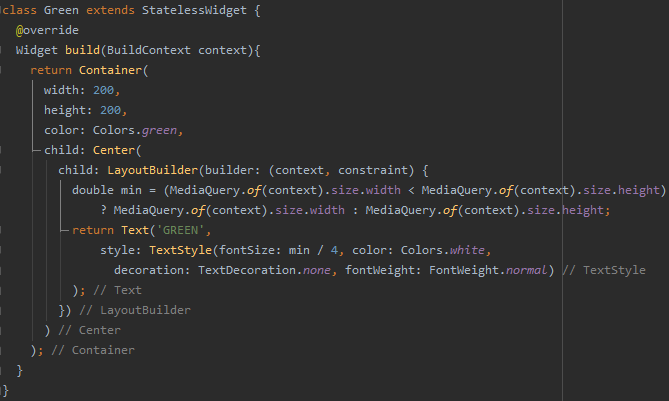
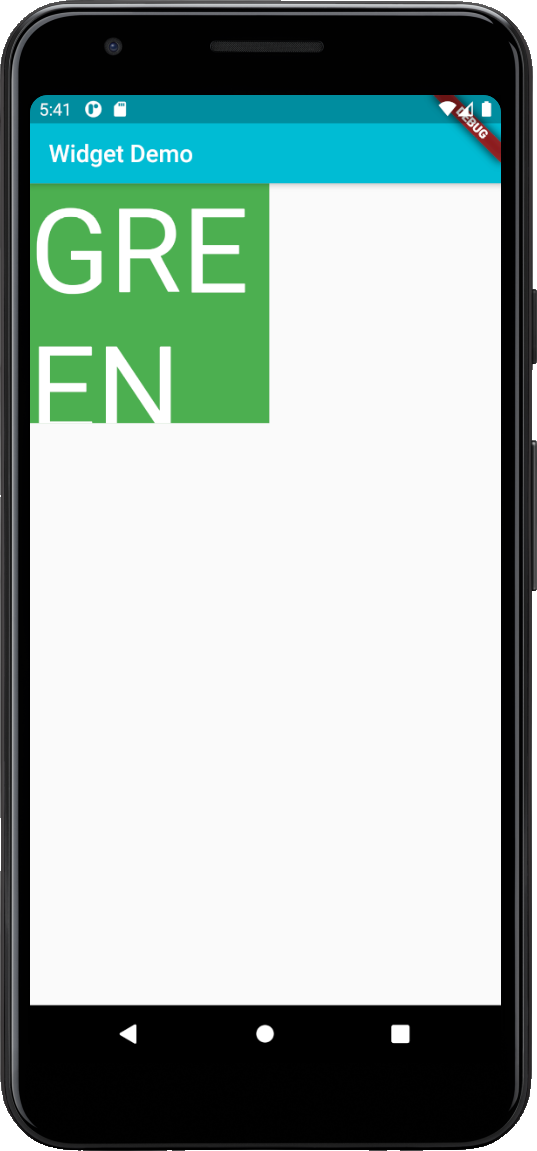
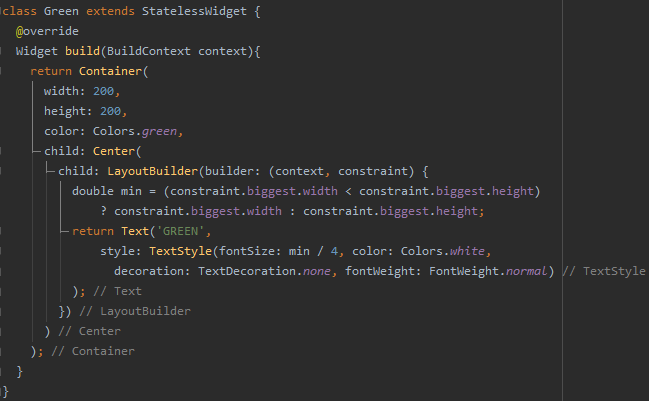
width, height요소에 Red는 MediaQuery.of(context).size가 할당되었고 Blue, Green은 constraint.biggest가 할당되었다. 두 경우 모두 Widget이 할당되는 공간에 대한 size 이지만 차이가 있다.
MediaQuery의 경우 현재 Widget이 아닌 최상위 Widget의 전체 context에 대한 Data가 할당된다.(확실하진 않고 추측이다) 각 Widget은 당 한개의 context를 가지고 있고 Widget의 트리구조에따라 context도 트리구조를 갖는다. 아마도 context가 호출 될 때 최상위 루트의 context가 호출되는 듯 하다. 따라서 child를 통해 하위 Widget을 구현한다한들 최상위 Widget의 context가 전달되어 결국 고정된 값이 할당된다. (**context에 대한 설명은 https://paulaner80.tistory.com/entry/Widget-State-BuildContext-%EA%B7%B8%EB%A6%AC%EA%B3%A0-InheritedWidget 참조)
constraint의 경우 현재 Widget에 대한 Data가 할당된다. constraint는 LayoutBuilder(builder: (context, constraint)...) 에 할당된 것으로 Widget의 Size에 따라 하위 Widget들의 Size 조절이 필요할 때 유용하다. constraint.biggest 는 LayoutBuilder가 사용할 수 있는 최대 Size를 제공한다. 아래의 경우 LayoutBuilder 는 Container 하위의 Center 하위에 있기 때문에 Container의 size인 (200, 200) 을 제공한다. (오차가 있을 수 있지만 거의 비슷함)


'Flutter' 카테고리의 다른 글
| Flutter TabBar (0) | 2020.07.21 |
|---|---|
| Flutter Swiper (0) | 2020.07.21 |
| Flutter 기본예제 (0) | 2020.07.15 |
| Flutter + ARFoundation 기본세팅 (Windows) (0) | 2020.06.19 |
| Flutter + Unity(IOS) (0) | 2020.06.19 |


