참고
_1 (전부 download)
https://github.com/jiulongw/swift-unity
jiulongw/swift-unity
Sample code that integrate Unity (2017.1+) scene into iOS (Swift 4.0, Xcode 9+) project. - jiulongw/swift-unity
github.com
_2 (Extra download)
https://medium.com/@IronEqual/how-to-embed-a-unity-game-into-an-ios-native-swift-app-772a0b65c82
How to embed a Unity game into an iOS native Swift App
Hi! For one or our future B2B contracts we have to integrate our Unity game into an iOS native Swift app. We have struggled for many days…
medium.com
번외(안봐도 무방) > UnityFramework를 계속 찾지못해 결국 실패했다..
https://medium.com/@charlesbrow316/embedded-unity-framework-within-ios-app-objective-c-7708586bc675
Embedded Unity Framework within iOS App (Objective C)
Embed your unity project to your native iOS Application and make it work as a part of your iOS mobile application.
medium.com
위 사이트를 참고하여 여러번 시도하고 구글링도 수십번은 했으나 1주일동안 삽질하다가 결국 스스로 찾았다...
사용한 버전
Unity : 2019.3.8f1
Xcode : 11.4
0-1. 참고_1 에서 파일 download, 0-2. 참고_2에서 Extra download **extra의 경우 AppDelegate.swift, Main.storyboard, ViewController.swift 파일 세개가 필요한데 0-1에도 같은 파일이 있다. 0-1 의 경우 demo unity에 있는 rotate관련 함수가 있기 때문에 찾아서 지우는것이 귀찮다면 0-2의 파일을 사용하자.**
1. Xcode project 생성


2. 생성한 Xcode Navigator에 0-1 에서 다운받은 Unity folder 추가


3. Unity project 생성


4. XcodePostBuild.cs 수정

/// <summary>
/// Path to the root directory of Xcode project.
/// This should point to the directory of '${XcodeProjectName}.xcodeproj'.
/// It is recommended to use relative path here.
/// Current directory is the root directory of this Unity project, i.e. the directory that contains the 'Assets' folder.
/// Sample value: "../xcode"
/// </summary>
//private string XcodeProjectRoot { get { return Path.GetDirectoryName(XcodeProjectPath); } }
private const string XcodeProjectRoot = "<경로>";

/// <summary>
/// Name of the Xcode project.
/// This script looks for '${XcodeProjectName} + ".xcodeproj"' under '${XcodeProjectRoot}'.
/// Sample value: "DemoApp"
/// </summary>
//private string XcodeProjectName { get { return Path.GetFileNameWithoutExtension(XcodeProjectPath); } }
private const string XcodeProjectName = "<폴더이름>";
5. PlayerSetting 및 Build


6. Unity Build 된 폴더 복사
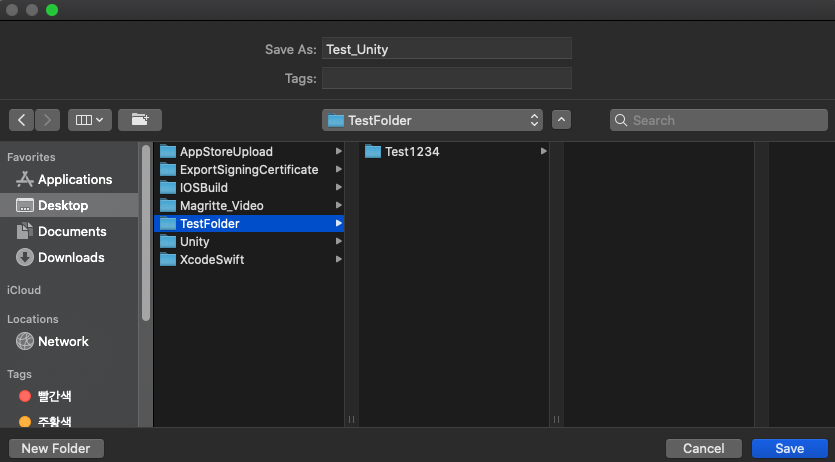
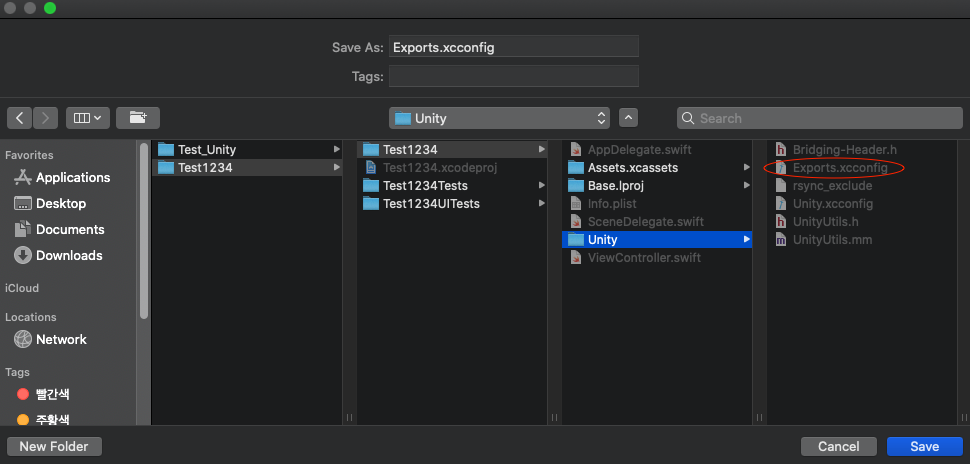
Unity Build 폴더에서 Classes, Data, Info.plist, Libraries, UnityFramework 폴더를 <경로>/<폴더이름>/Unity에 복사해준다


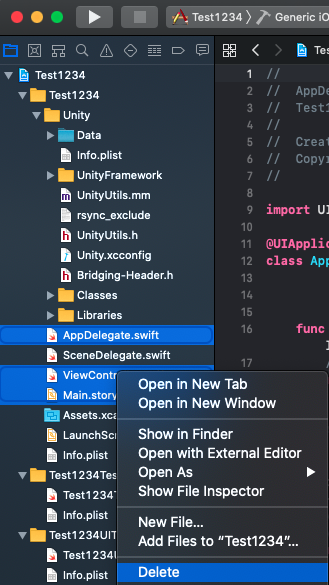
7. XcodeNavigator에 추가
Unity 폴더 아래에 Drag and Drop (Data 는 add option 설정이 다름)


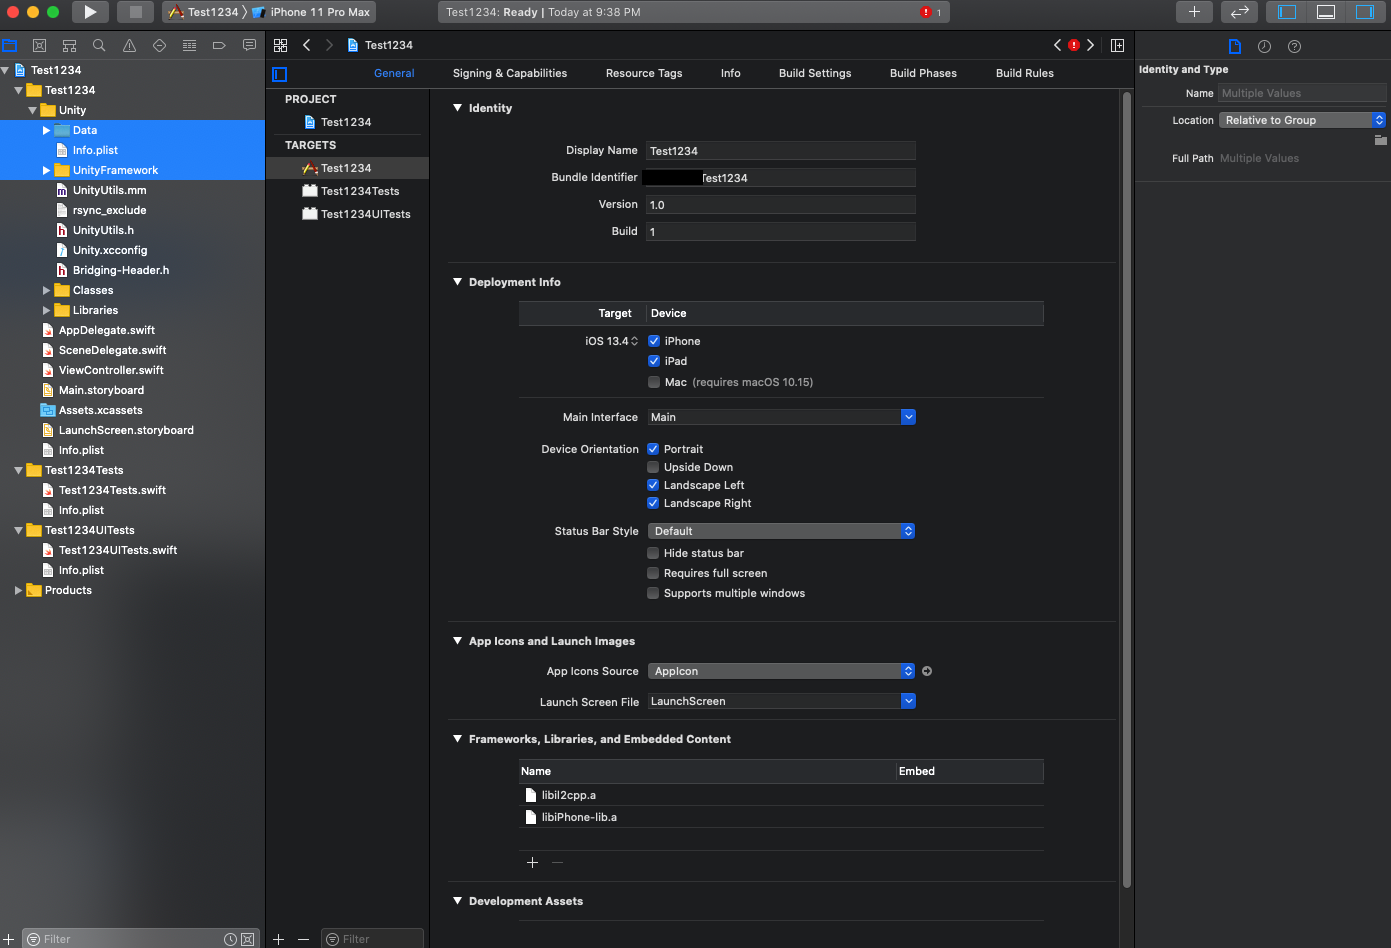


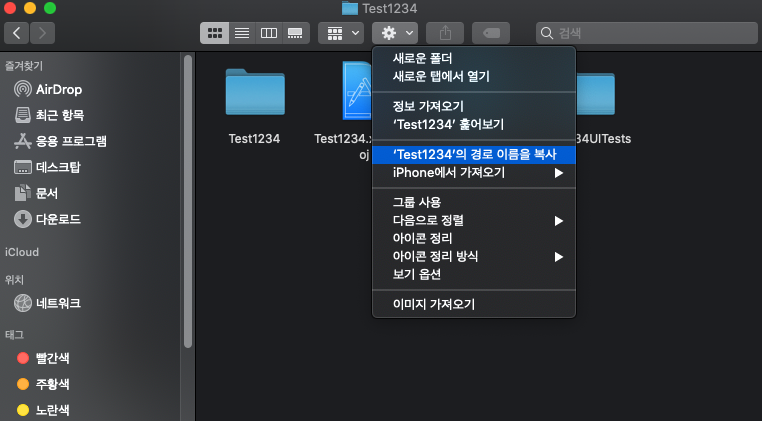
8. Project Info 수정


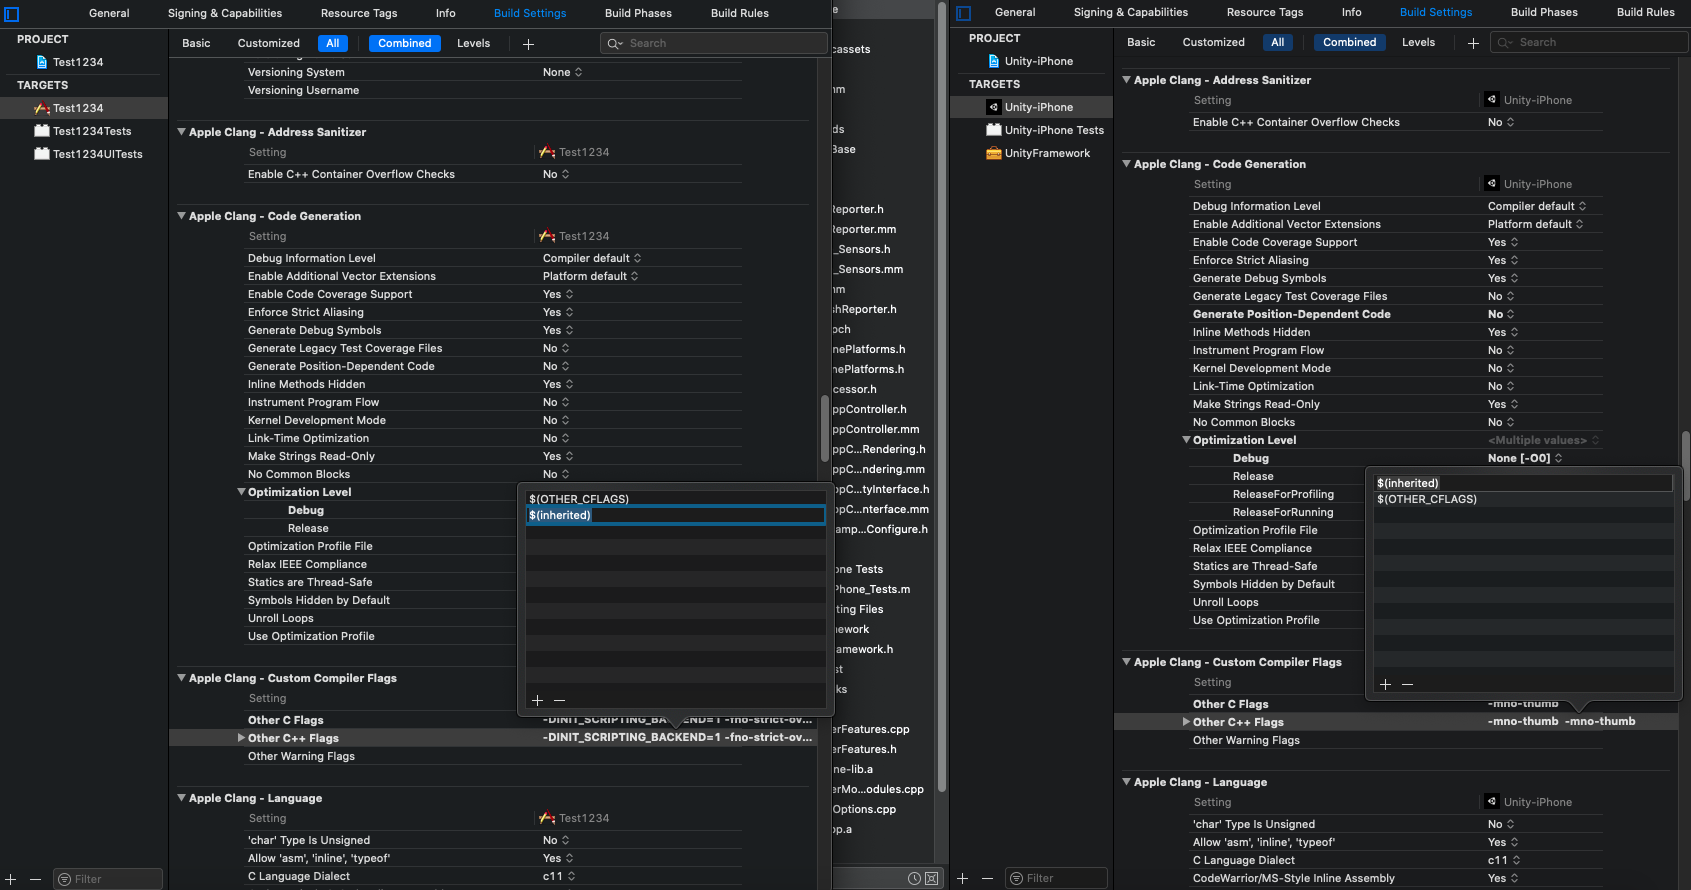
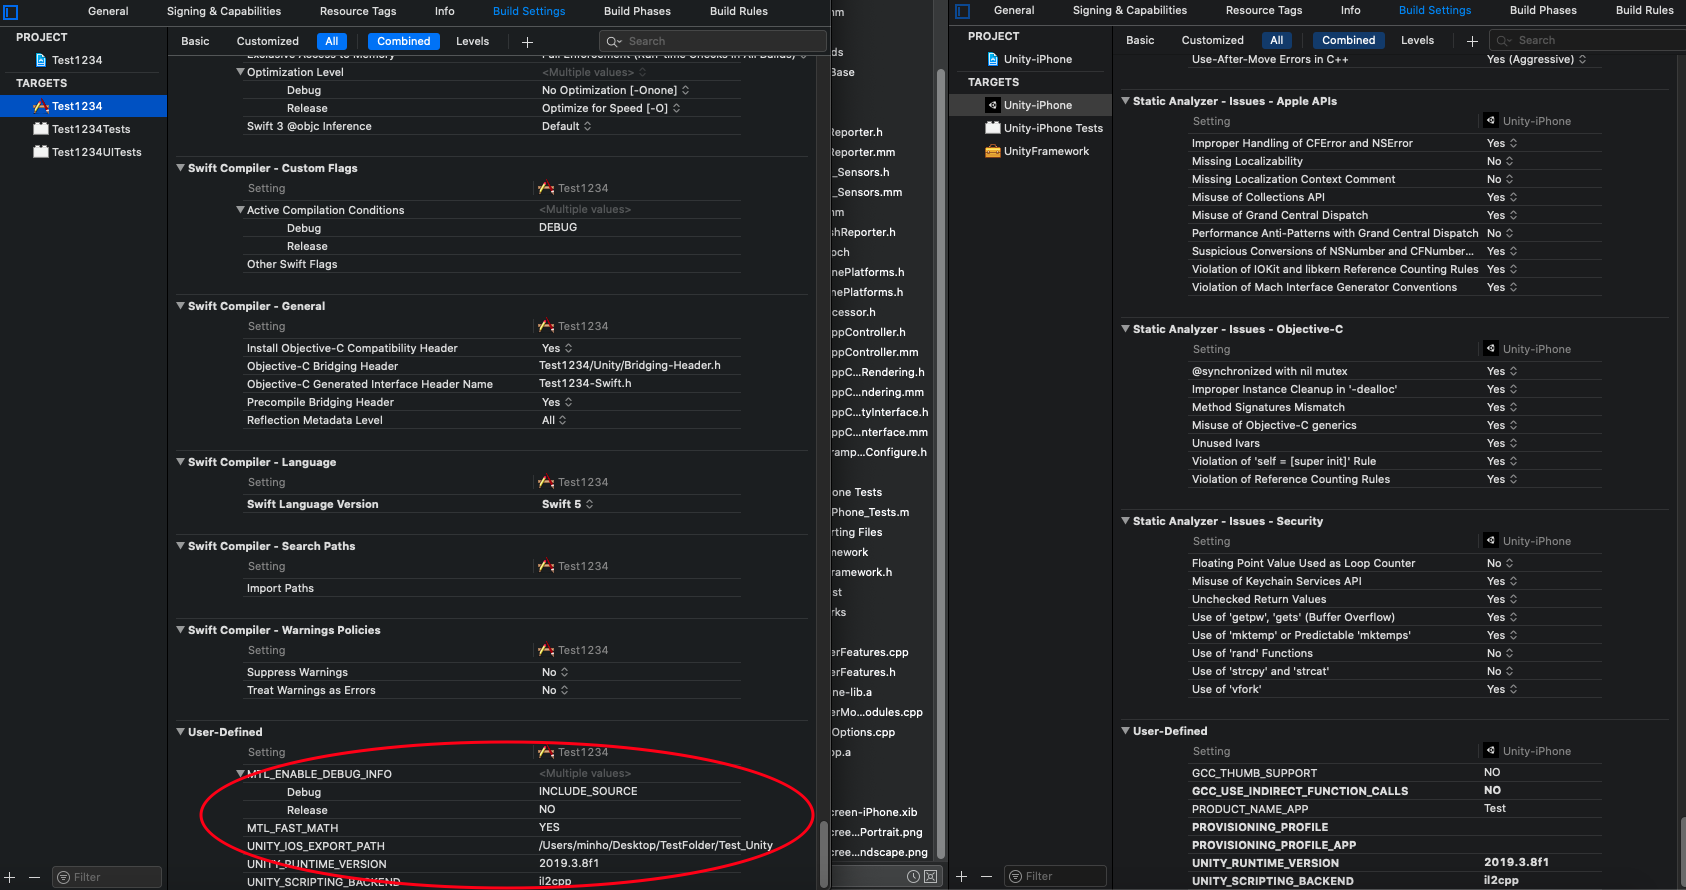
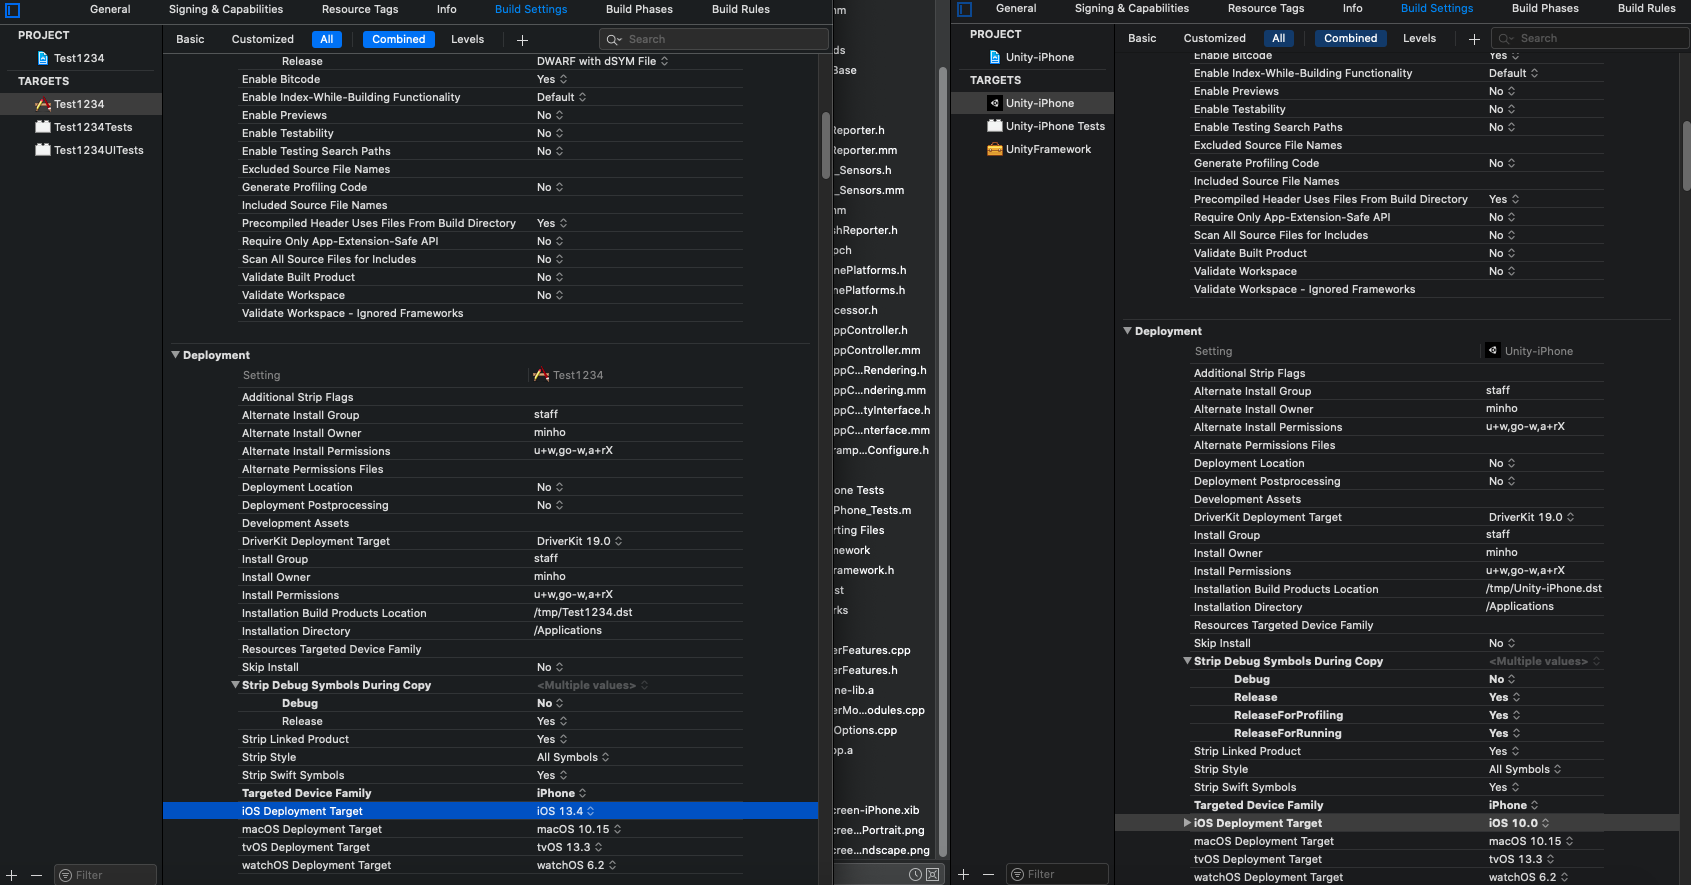
9. 노가다
Unity 에서 build 한 xcode project를 열고 PROJECT와 TARGETS의 build settings를 비교하며 Unity build settings와 똑같이 수정한다. **PROJECT build settings 먼저 수정 후 TARGETS build settings 수정, dropbox부분은 전부 동일하게 설정해 주되 xcodeproject의 build settings에만 있는 option들은 그대로 두거나 합친다.** 아래 사진들은 예외인 부분들을 모아놓은 사진


10. 끝!!!!..?
아마 안될것이다. 여기서부터는 그냥 빌드에러만 수정해주면된다. 빌드오류부분을 클릭하면 오류난 파일로 자동으로 이동한다. 파일경로를 찾기 귀찮다면 빌드, 수정을 반복하면 되고 반복하는게 귀찮다면 파일경로 알아내서 한번에 수정하고 빌드하자.


11. 진짜끝!!!
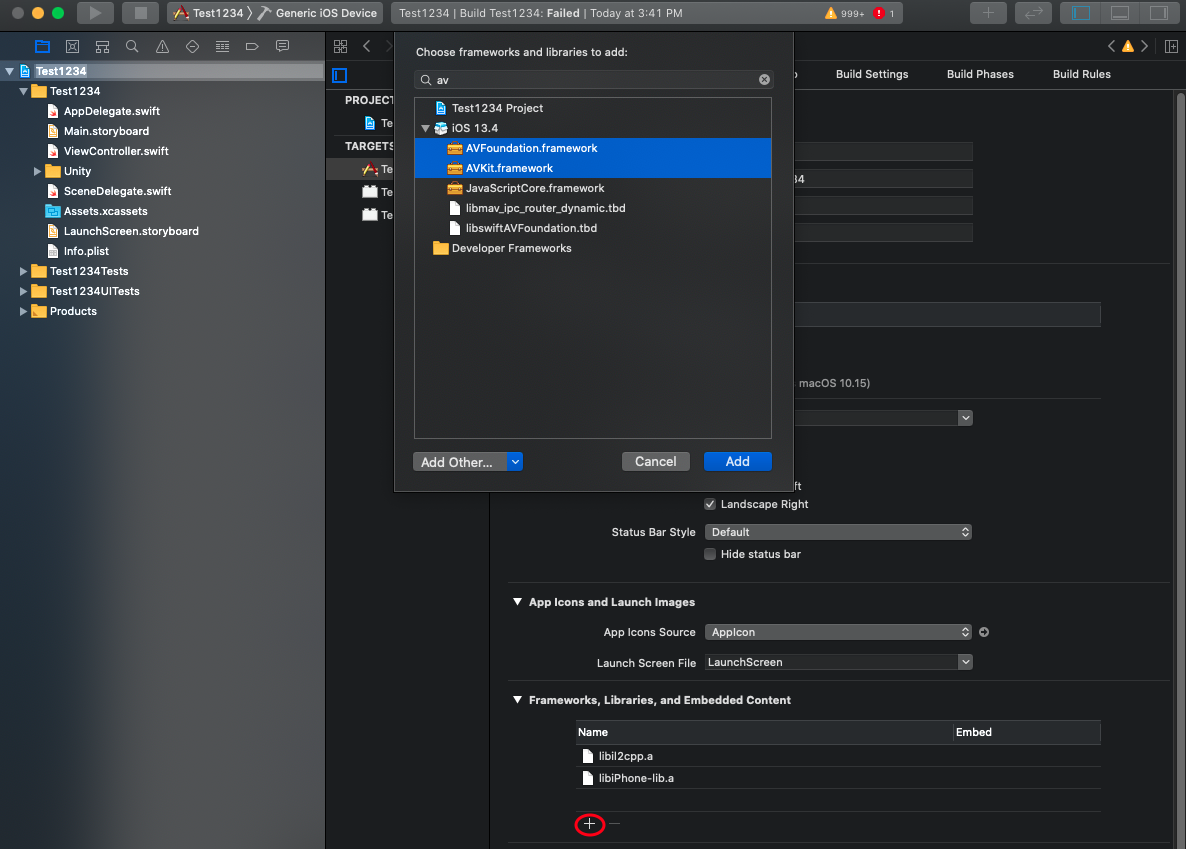
Unity 2019.3.5f1 로 시도했을 때도 가능했다. cube만 있는 기본적인 Unity 빌드파일에서 구동했으나 복잡한 Unity 빌드파일의 경우 추가적인 Framework가 필요할 수 있다. (_OBJC_CLASS... 로 시작하는 오류는 framework 오류일 가능성이 높다)


'Unity' 카테고리의 다른 글
| Unity ARCore Cloud Anchor (1) | 2020.06.25 |
|---|
